Showing posts with label Tutorials. Show all posts

Sunday, January 30, 2011

Make and Take Challenge #2

Here is my demo for Challenge #2.  Let me first say that I learned this technique from my Stampin Up demonstrator Vicky Frescas. 

Materials needed:
  • A shallow plastic bowl
  • white felt
  • a rubber stamp of your choosing (this does not work very well with acrylic stamps)
  • 4 or 5 of the Stampin Up ink refill bottles
  • White cardstock

Instructions:
  1. Place felt in shallow plastic container
  2. Take first ink refill and squeeze out into a circle in the middle of the felt
  3. Repeat around the circle build out as you go along
  4. Press stamp down hard into the felt to get good coverage
  5. If you seal this up, it will last quite a while.
  6. Have fun with this! 


Wednesday, July 7, 2010

Mom's 75th Birthday Favor boxes


Mom's 75th Birthday Party Favor boxes.  She turned 75 on  Sunday, July 4th, 2010.
Materials used in this project:

  1. Dark Red cardstock

  2. Red cardstock

  3. White cardstock

  4. Blue cardstock

  5. Navy Blue cardstock

  6. Silver Brads

  7. Cuttlebug Star Embossing Folder

  8. Sizzix Big Shot Express or somekind of embossing machine

  9. Fiskar's Scallop Circle Punch

  10. EK Success 1 1/4 Circle Punch

  11. Stampin Up Star Extra Large Punch

  12. Terrifically Tacky Tape

  13. Pop Dots

  14. Red and Blue polka dot ribbon

  15. Paper Stuffing

  16. Peppermint candy

  17. I hope I didn't forget anything, lol


The box was cut out from my Cricuit using the Tags, Bags, Boxes and More cartridge.  I simply chose the box and hit cut.  I made a total of 20 of each color or 40 total.


This is a Cuttlebug embossing folder.  See the flat part on the end?
I cut the end off of the folder.  I will explain more later. 
Here is the folder cut off.
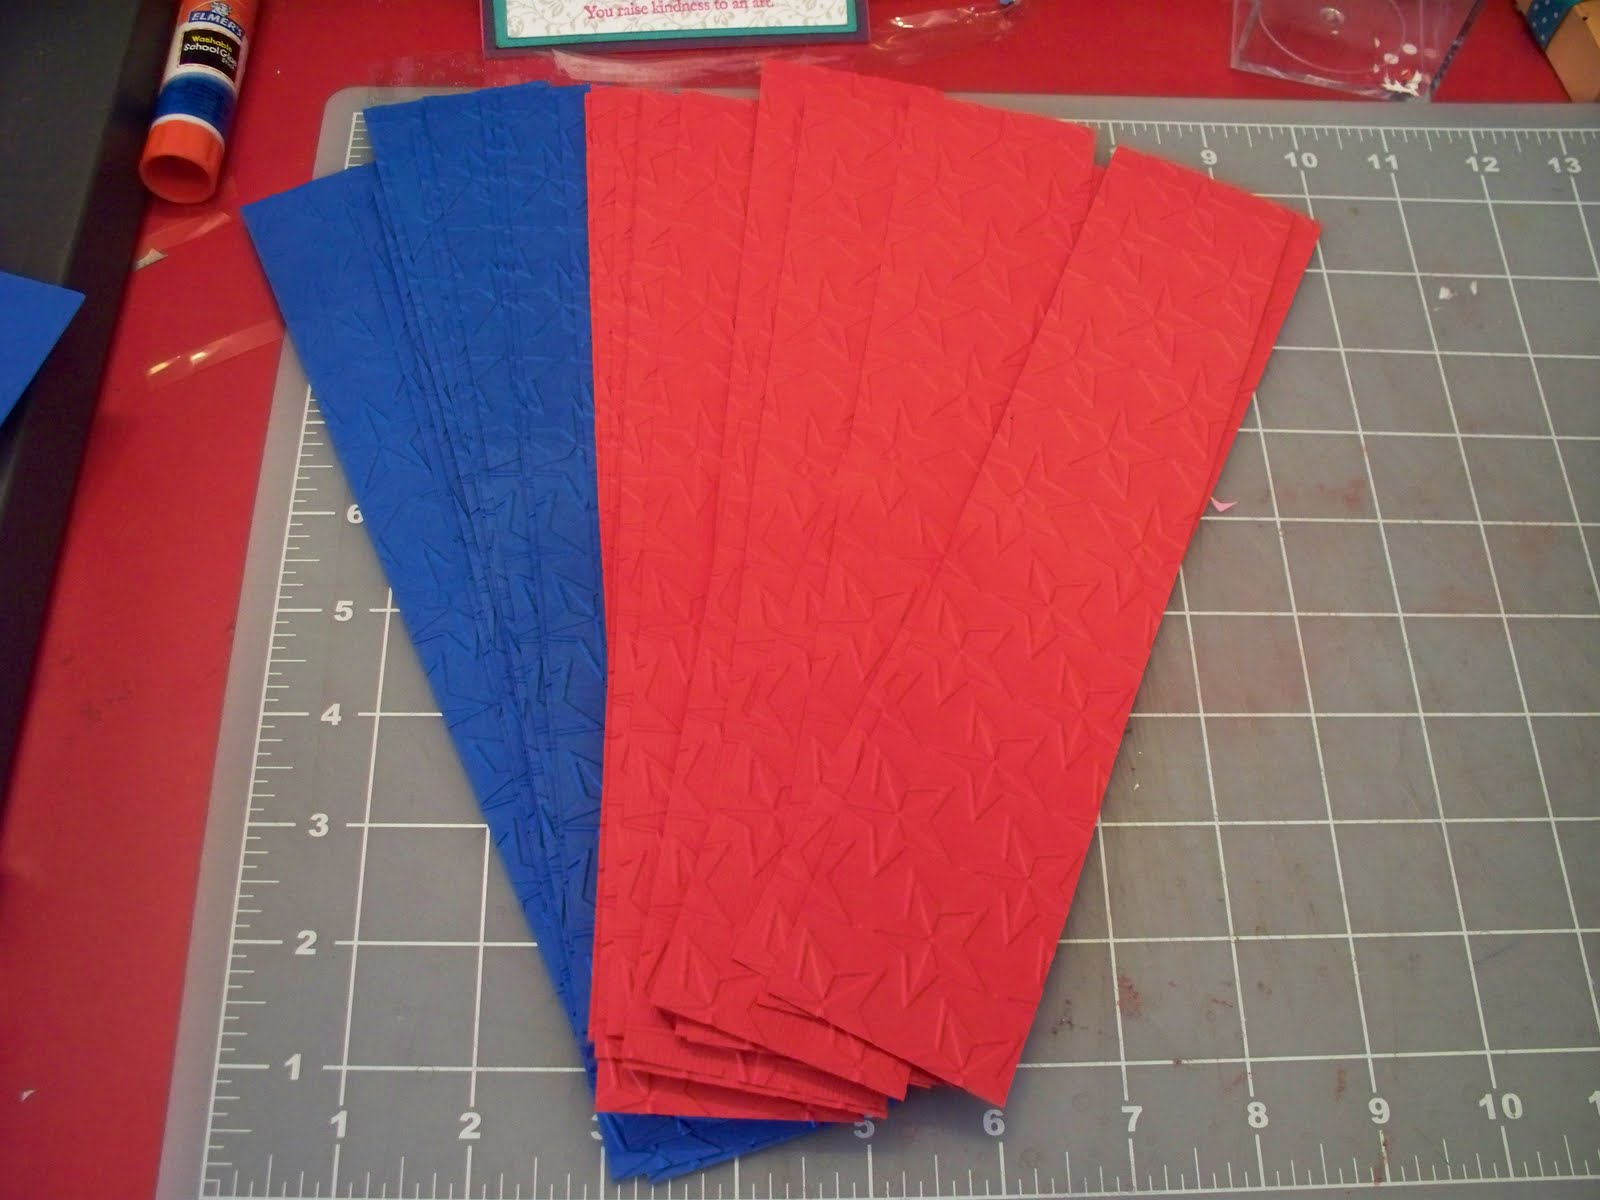
I needed to get some two inch strips covered with embossing.  The problem was that I needed them to go all the way around the box.  Since the folder has a flat end on it, I cut off the end of the folder with my office paper cutter.  I didn't use my Fiskars paper trimmer for this because I don't want to ruin it. 
You will see why below:
I ran one side of through my Sizzix, and turned it over and ran the other side.  You will get a small part that won't match up, however, you really can't tell once you place it around the box.  It's kind of hard to see in the picture below, but I have already run one side throught the Sizzix.
Here are all of the boxes cut out of the Cricut machine.
Here are all of the strips run through the Sizzix.  These strips are 2 inches wide.  I am not providing a length because that would depend on how big you choose to cut them out of the Cricut.  Mine were approximately 10 3/4 inches.
The next step is to assemble the boxes, so I used Red Tape for these.
Then I attached my strips in the opposite color.  You will see them demonstrated below in the final product.  You don't have to use this much Red Tape, I started using this much and then went back and just put in on the ends.  I was going through tape like crazy and it was costing me a fortune.  Sorry, I forgot to photograph that!  I am sure you get the idea!

The next step is to punch out circles with my Fiskar's Scallop Circle Punch.  I made 40 boxes, so I punched out 20 in blue and 20 in red.  Then I distressing the red circles with blue ink, and distressed the blue circles with red ink.  To distress, I just cut out a sponge from the dollar store and use the end of it to work around the edges.  Thanks to my Stampin Up Demonstrator for the sponge tip. 
I call this the poor man's distressing!  : ) 

Next, I punched 40 white circles using a 1 1/4 circle punch.  I then stamped them with Stampin Up's July 4th fireworks round stamp.  Don't forget to distress the edges in red ink.  I stamped all 40 in red.  However, you could choose to stamp half in blue and half in red.


Okay, next are the stars.  I punched out 10 stars for each box:

  • Two in dark red

  • Two in red

  • Two in white

  • Two in blue

  • Two in navy blue
Put them in order in red, white, and blue and punch a hole in the center where a brad will be placed.  I placed them in a plastic square container and sprayed them with water on both sides.  I learned this technique from my Stampin Up Demonstrator.  Then crunch them up and play with them until you get the desired look.  Attach the brad.  They will dry hard and look really cool!

Next Step: 

  1. Attach the stars to the punched circle with pop dots.

  2. Attach the circle to the scalloped circle with pop dots.

  3. Attach the scalloped circle to the lid of the favor box with pop dots.

Now, attach a ribbon over the embossing around the wide part of the box, and wah-la, you are done. 

On the inside, I stuff them with corrugated paper stuffing.  You can find this at Walmart for $1.00 a bag in the crafting section.  I used blue and red, of course!  These were for my Mom's 75th birthday party.  I originally wanted to put chocolates in there, but I ended up putting peppermint candies.  I needed something that wouldn't melt!


Tuesday, June 22, 2010

Baby Shower Favor Box Tutorial Part #1

Here is a tutorial for some Baby Shower Favor Boxes I have made:
Step #1. 
These favor boxes were cut out from my Cricut Plantin Schoolbook Cartridge.  You can make them different sizes, I believe mine were 5 inches.  Make sure to score the boxes on the folds using a Scor Pal or some type of scoring tool.

Place Terrifically Tacky Tape on the end and on the bottom.

Adhere the box together as shown.
Step #2
 Cut out the same images using patterned paper. 
It doesn't all have to be the same color, just matching colors. 
You will see different patterned papers here.
Using my Fiskars trimmer, I trimmed off all the handles,
the skinny sides of the box, and the bottom of the box.
You should only have the big sides remaining as shown below.
Here is the completed two toned favor box.
Step #3. 
Now you need to put the favors in the box:
First I put in some paper stuffing, otherwise I will be in the poor house!  LOL
I stuffed these with Frosted Animal cookies. 
I use baggies from the dollar store and
ties that I have laying around the house.
At that moment, it was the only thing
I could find that was pink and white!
Step #4
Here are all of the boxes stuffed and ready,
now I need to tie some ribbon around the handles. 
I usually attach a pink baby pin or a pink clothespin to these,
but I couldn't find any for this event so I did without.
Step #5
I like to present them on something that looks fancy. 
In this case I used a cake round that I found at Walmart. 
These are inexpensive and they even have pretty swirls on them.
Here they are completed and presented for the mother to be
at her baby shower!
The finished project!
View from the top!
Close up shot!
This is a pretty easy project, however, it can be time consuming depending on how many favor boxes you need to make.  Be sure to tell your customers or your friends that you will need at least two months notice.  Some people don't like to use their Cricut machine.  But this has been a life saver for someone like me who creates these types of boxes often.  If you have carpal tunnel like I do, I am sure you will understand.
Also, there are no more crooked boxes from my crooked cutting! 

Thank you for stopping by my blog today.  I hope you enjoyed the tutorial.  If you have questions, please leave a comment and I will get back to you as soon as possible.  Have a wonderful day!

Tuesday, April 27, 2010

Earth Day Card Contest

Kelly Jo had an Earth Day contest in which we could submit one scrapbook page or two cards. The catch was that we had to use some sort of recycled material. I chose to use Diet Coke cans for my projects. A lot of you have been asking how I put this plan into action, so here is a little picture tutorial for you:


I cut the top and the bottom off using my awesome Craftsman knife and my even more awesome Fiskars kitchen shears (these things will cut anything)!


Once I cut off the bottom and the top, I then cut a slit across the heighth of the soda can:


Okay, now it's time to get out your Sizzix Big Shot or whatever comparable machine you have that will run Sizzix dies. I used my Top Note Die and my Scallop Circle Die for this project. I ran both cans through the machine, just as I would paper. This is how they turned out:


At this point, I sanded the edges a bit, because they were pretty sharp. Proceed with caution when using any type of sharp metal. Then I ran them through my Sizzix again using two different Cuttlebug Embossing folders. I used the polka dots and the swirls for this project. I turned the can over, so that you can still see that it is a Diet Coke can here:


I had so much fun doing this! Now I want to try and paint the aluminum, or alter it in different ways. Thanks for checking this out! Here are my finished projects:

Card #1


Card #2


Have a great day everyone!